


Overview
Mobile application deployment has historically been a cumbersome process. Each deployment typically requires two builds (one iOS and one Android), each deployed to a separate store instance that must be manually configured and managed. While several effective tools have emerged in recent years to streamline this process, they all are understandably tuned to the most common use case: building one application for each platform and deploying those applications to the App Store and Play Store, respectively.
However, business needs are varied and complex. The existing mobile app tooling, while providing a good foundation, does not always have out of the box support to fit the needs of a business. White labeled applications are one such situation. What happens when, instead of building and deploying two applications, you need to deploy tens, hundreds, or even thousands of mobile applications across both platforms from one codebase, each with their own unique assets, branding, and features? Let’s first take a look at a rudimentary design for a white labeled iOS application and see where scaling issues would arise.
Basic White Labeled Application Structure
The simplest way to build a white labeled iOS application with varied assets and branding is by creating a new target and scheme for each customer. Each target can have its own assets, signing certificates, package name, and version. When it comes time to build and deploy the applications, the CI/CD pipeline simply needs to iterate through each of the build targets, build them, and deploy them to the App Store. Easy enough, right? Whenever a new customer is onboarded, they simply need to email the required assets to the development team to use in creating new targets and schemes. New provisioning profiles and certificates will need to be generated for each app, and a new app store listing will need to be created for the given package name.
This setup may work wonderfully for a small white labeled application with three or four customers. However, consider some of the following implications and possible problems with such a system:
- Customer configurations are checked into source control. Any customer changes to branding or assets requires updates to the targets and schemes and a pull request.
- What happens when a customer makes changes mid-release cycle or a new customer is added mid-release cycle? How will scheme updates and redeployments work?
- Any changes to app configuration requires developer time. Someone will need to manually propagate changes from the customer down to the repository.
- What happens if one of the builds fails to upload to the App Store due to a 503 Service Unavailable error or other error outside our control?
- How do we manage testing? Do all apps run the full suite of tests?
These issues may be minimally impactful in a system with only three or four apps, but quickly become unwieldy when there are over one hundred applications to manage and build each release cycle.
A Scalable Approach
While the specific business needs for a given application will vary and impact how we approach this system, let’s imagine an application that has branding and feature flags as the white labeled components. We don’t want to have hundreds of customers emailing assets and configuration details back and forth. We will assume that, in addition to the mobile app, customers also get access to a website where they can manage their white labeled applications. As we think about building a scalable pipeline solution, let’s keep these requirements in mind:
- Changes made by customers to their applications and the addition of new applications should have no developer overhead outside the initial setup. Any changes or modifications should be automatically propagated to the app configurations for the next build.
- The generation of signing certificates should happen automatically.
- Any steps that happen “per deployment” need to be fully automated.
- Each application needs to land in a unique app store instance.
- Optimization in build times is crucial, as there is a real world cost to adding one minute per app build when there are a hundred or a thousand apps.
The diagram below outlines one possible workflow that meets these requirements. It shows the flow for one customer, and must be scalable for any number of customers. We will use this diagram as a guide for our basic implementation.

Each customer will have access to a website, wherein they can manage their applications. When they are onboarded, they will be able to log in and upload their assets, manage feature flags, and set metadata required for building including the package names, Apple team ID, application display names, and any other white label-able fields for the specific product. Whenever a deployment occurs, the release pipeline will fetch all available application configurations from the website, build them, and deploy them to the matching store listing.
Tools
While existing mobile tools do not support a system like this out of the box, they can be incredibly powerful and used as a foundation for our system. In this paper, we will be using fastlane, a well supported open-source mobile build tool. Fastlane is a highly configurable and extensible tool built with ruby. We will be using it to wrap around native mobile app build tools and create custom, testable custom actions. Because it is written in ruby, all of our additional scripting will be done in ruby as well. Fastlane will mostly obscure our interaction with the platform specific build tools gradle and xcodebuild, though we will need to do some work in gradle to get our Android white labeling working correctly.
Throughout this guide we will have fastlane examples. These are simplified from what should be written in a robust and reliable pipeline and often need additional configuration to run correctly depending on your setup, but will give you a good starting point for the logic involved in each step. Here is an example from the fastlane docs of a lane for building and deploying one iOS app and a lane for building and deploying one Android app:
There are a host of parameters and options for these built in calls we will be leveraging to build our scalable white label solution, but we will be using these two lanes as a starting point. The only thing that is important to note here is that we will be using fastlane match to handle the signing certificates and provisioning profiles on iOS. By specifying the Apple team name and ID, match will automatically generate, fetch, and install profiles as needed for each configuration. We will cover automatically authenticating to the Apple Developer portal in the Deploying to the App Store and Play Store section later.
For other components of this solution, like feature flags and CI/CD platforms, this guide will remain largely agnostic so you can decide on the best solution for the specific business needs of your project.
There is a GitHub repository located here with completed code examples if you would prefer to follow along that way.
With our toolbox packed, let’s begin stepping through the flow for a deployment and see how we can build our scalable solution at each phase.
Storing and Fetching Configurations
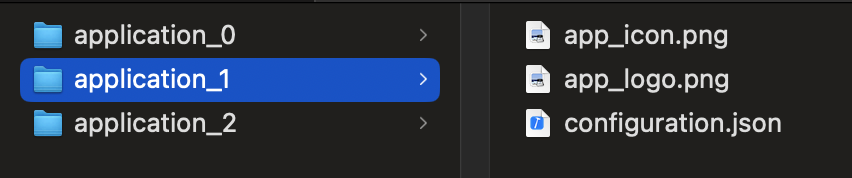
The first step of our workflow outline is the configuration of the white labeled apps in a web portal. Building the customer portal is outside the scope of this paper, so we will assume that a basic website has been created that can store app configurations in a database. We will also assume that it has a REST endpoint from which our build pipeline can fetch a list of apps to build and their associated assets. The details of this implementation will largely depend on your security requirements and preferred technologies. From our pipeline’s perspective, we should be able to send a GET request to the endpoint exposed in our web application and receive a .zip file that contains one folder per application to build, each with a JSON configuration file and the assets required for the build. This example JSON file has all of the fields needed for our system, and we will explain in depth how to use each field throughout this guide. Here is an example of what the zip contents should look like:
The configuration.json file should look something like this:
We can fetch and unpack these assets as part of a custom fastlane action. We will be using fastlane actions to accomplish all of the tasks we need to automate within our system. Here is a template of a “blank” fastlane action.
Using this template, we can write an action that fetches and unpacks the zip file. It will look something like this:
With this action written, we can invoke it in our Fastfile as follows:
Now we can fetch and unpack our configurations and assets with a custom Fastlane action. However, as of now, we aren’t actually doing anything with those configurations. We now need to process those configurations into buildable applications.
Processing Configurations and Building Apps
In our rudimentary white label setup from before, our build targets were created and updated manually whenever a change was required. Now, we need to automate this process. We will tackle each platform individually, as their build steps and requirements are unique.
On iOS, as we discussed previously, we need to have at least one target and scheme for each application we want to build. To accomplish this, we will create another custom fastlane action. In this action, we recommend leveraging the xcodeproj ruby gem to script the creation of targets and schemes. This gem is incredibly flexible and powerful.
The precise implementation of your target manager is up to you. At a high level, what we have found to be most effective is to have a “template” set of targets and schemes for your app. For development, you will presumably have at least one scheme and a set of targets for various portions of your app. You can use these as a starting point, from which you can copy and edit to create new targets and schemes for each application in the config file. This is much simpler than creating a new target or scheme from scratch. Additionally, any configuration changes you make to your templates that are required to develop new features will automatically get propagated to all new targets and schemes that get generated in the build process.For the sake of this example, let’s assume we have a class called XcodeProjManager that has a function called create_targets_and_schemes. Our custom action would look like this:
Now we can incorporate this action into our Fastfile. We will now iterate through each folder in the configuration directory and build the scheme that we created in the above action. We will also need to modify our match command to make sure we fetch the correct provisioning profile and signing certificate for each app as well. Our updated Fastfile looks like this:
On Android, the steps for processing the configurations are different. Android does not have targets and schemes in the same sense that iOS does. There is a concept of configurations, but these are most commonly used for development. Instead of interacting via ruby, we will be interacting directly with gradle. First, we need to be able to dynamically set the bundle ID. In our application’s build.gradle, we will first modify the defaultConfig block and set the applicationId as follows:
At the bottom of the build.gradle file, you can define this function as follows:
Now, when you build the app in Fastlane, you can set the appId property when you go to build the application.
While this code gets our application ID set properly, we still need to get the assets loaded into the correct place. For this, we will use the fastlane plugin appicon. You will need to have rmagick installed for this to work properly. For the application logo, there is no existing plugin. We can simply copy the file to the spot we expect it for use within the app. Once these are set up, you can set the app icon in the Fastfile as follows:
Deploying to the App Store and Play Store
Now that we can build apps with dynamic assets, the final step is to push the applications to the respective app stores. As you may have noticed if you tried to run the lanes defined in our Fastfiles, fastlane will prompt you for additional information to complete the upload. Among these prompts is a username/password and 2FA code to authenticate to the App Store and the path to a Google service account key to authenticate to the Play Store. Thinking back on our requirements for the pipelines, we need to be able to authenticate to any number of different store instances via our CI/CD platform without manual intervention. Both iOS and Android have a supported path to authenticate via fastlane. We will use these fastlane tools as a starting point for our scalable solution.
On iOS, the scaling issue can largely be solved simply with some clever setup. Instead of having the credentials for every unique Apple Developer account that hosts an app, we will leverage the fact that, at the time of writing, a single Apple Developer account can be a part of any number of teams. We will first set up an Apple Developer account exclusively for use by our CI/CD system. It should be set up under a generic email address, like pipeline-runner@phase2online.com. For each customer in our white label system, when their Apple Developer account is first set up, they will add our proxy email address pipeline-runner@phase2online.com as a user on their team. When it comes time to push to a given account, we specify our user and the Apple Team ID of the destination account.

As long as our proxy email has been added as a user on the Apple Developer account, we will be able to access the correct App Store instance via Fastlane. With this setup, we only need to authenticate one time to one account. The initial setup of this account in your CI/CD pipeline will depend on the platform, but in general you will need to set up a fastlane application specific password and/or complete a 2FA login. Most platforms have a method of passing a valid 2FA session to the build process. For instance, on the popular mobile app build platform Bitrise, you would simply set up the Apple service connection with the proxy account.
Once the authentication structures specific to your platform are in place, you can upload to the correct App Store instance from your Fastfile as follows:
For Android, scaling presents an interesting logistical challenge. The primary supported solution leverages a Google service account and associated JSON key to authenticate to the Play Store. It is simple enough to add this service account to a Play Store instance and have the JSON key loaded into your CI/CD environment. This setup will work for up to ten Play Store instances, where you will hit an error that, at the time of writing, is not noted in the docs. One service account can only be listed as a user on ten Play Store instances. Once you try to add that account to an eleventh account, you will get a message that the service account has been added to the maximum number of accounts. As far as we can tell, this is a hard limit and cannot be increased like other soft limits in Google Cloud. This means that every ten applications require another service account.
There are several ways we can tackle this problem. We could manually create a new service account and add its key to the pipelines as needed, but depending on ramp up time and number of customers that could get unwieldy quickly. The most efficient way to handle this is to “seed” your production environment with some upper limit of possible applications one time with a script. For this example, let’s set our initial customer limit to be 5,000.
In order to support 5,000 Google Developer accounts from one single pipeline, we will need one service account per ten applications. This gives us a total of five hundred service accounts. However, each Google Cloud project can only have one hundred service accounts before you must request a quota increase from Google. Since these requests can get rejected for a multitude of reasons, let’s design our system to work within these confines.
Given the above constraints, we will create five Google Cloud projects, each with one hundred Google service accounts that can work with ten applications. If you look through the fastlane docs for setting up Google service accounts, you will see that there are a fair number of steps that would take many hours to complete for all five hundred accounts. Instead of manually creating these and storing each of the JSON keys, we can script this process.
Before we write our script to create the keys, we should decide on a secure method of storing and accessing these keys from within our pipelines. Instead of reinventing the wheel, let’s take inspiration from how fastlane match encrypts and stores secrets for iOS apps. We will write a script to create all of the required JSON keys, encrypt them, and store them in a Git repository. Then, when we run our deployment, we can fetch and decrypt the keys we need from the Git repository as needed.
The first step, which we will do manually, is to create five Google Cloud projects. Follow the Google docs to get those created. Within each of those projects, you will need to enable the IAM Service Account Credentials API, the IAM API, and the Google Play Android Developer API. To create the accounts and keys, we will be using the Google Python Cloud Client Libraries. Next, you will need to set up your local Google Cloud CLI installation as described in the docs.
From the documentation, we can find the following code snippets for creating service accounts and keys:
The exact implementation of your script is up to you depending on your needs and the number of service accounts you want to make, but leveraging the two above functions you should be able to loop through 0-99, create one hundred service accounts per Google Cloud project, and write their json_key_data to a file. The name of the JSON file should match the service account email address, so that it is easy to link them up to the account specified in each app’s configuration file.
At the end of this process, you should have roughly five hundred JSON key files unencrypted on your local machine. You can encrypt these however you wish. We have found the ruby GPG gem to be an effective tool for this purpose. Once all of these keys are created, you can store them in a place that works for your project. Storing them in the same Git organization as your codebase and fastlane match certificates makes fetching them a bit easier from the pipelines, which should already be configured to access those repositories.
Now that your service keys are encrypted and stored, we can write another custom fastlane action to fetch and decrypt them from our deployment lane.
With this action implemented, you can add it to the Fastfile as follows:
With this setup, you will be able to use any appropriate JSON key to upload any package with the appropriate key. You will need a way to track which service accounts are on which apps, though a simple spreadsheet works fine in practice. As customers are brought on to the product, they will be assigned a Google service account email address for their app based on what is currently available. They can add this email to the app store listing they create during the onboarding process to enable the pipelines to push to their app store instance.
Optimization
Now that we have a working setup to build dynamic configurations on the fly and deploy them to a unique store instance, we will turn our attention to refining the system. One critical area to address is efficiency. In single application or small white label setups, incurring a 10% build time overhead on one hour of total build time per deployment is significant but not too costly in terms of cloud platform usage or delay in deploying on release days. However, if you need to build one hundred applications and each one takes one hour, you are looking at one hundred hours of credit usage on a platform like Bitrise in addition to a huge gap between the first and last apps getting deployed. Minimizing build time is crucial when any inefficiencies become multiplied by a hundred or a thousand. Let’s discuss some strategies we can employ to optimize our build pipelines at scale.
One of the easiest ways to reduce build time is to reduce the number of builds we run each deployment. When there is a new release, we will need to deploy every application. However, depending on business needs and release cadences, some amount of off-cadence deployments may need to happen. In these cases, there are a few possible strategies ranging from simple to complex.
The simplest solution is to add an option to only build one specific application. We can add a check to our Fastfile that checks if we have an environment variable called APP_TO_BUILD set, and, if we do, discard all configs other than the given app. A basic implementation would look like this on iOS:
In a production environment, you would most definitely want a more robust check than a string comparison on a freeform user-input string field. However, this would allow you to run deployments for newly onboarded customers or redeploy failed builds in a one-off fashion.
One limitation of this solution is that the pipelines have no concept of prior runs. They cannot know what may have happened in a previous run unless something tells them what happened. Since we already have a database on the backend that stores app configurations, we could add a field that tracks the last deployed version for the app. This way, when we pull an app configuration, we can know if the version we are attempting to build has already been deployed. In practice, this would allow us to rerun our deployment for one hundred apps and only build the apps that failed to go out on the previous run for one reason or another.
To accomplish this, we will need to add a PUT endpoint to our backend system that allows us to update the app configurations with the current deployed version. We would first update our configuration file as follows:
We will define a new custom action that will PUT the updated configuration on a successful build, the implementation of which is dependent on your needs. Let’s assume we have an action available called put_updated_configuration that takes a JSON object to PUT back. There will obviously need to be more robust data safety features and models in a production situation, but a simple implementation would look something like this:
Another optimization to consider is that of testing. Having a robust test suite is critical for any large scale application. However, there becomes a practical consideration in running an hour long test suite on each application we need to deploy. The needs of your system may vary, but what has worked for us is to define a subset of applications that cover the entirety of the feature set available. Usually two or three apps will suffice for this purpose. The configurations for those test apps are then stored either in the database or locally within the Git repository. When we go to run a deployment or as part of the nightly test builds, we build and test just that subset of applications. If those all pass, then we can have high confidence that all of the other configurations will also succeed. A useful tip for this strategy is to make note of any bugs that appear in production that should have been caught by tests, and then add those problem applications to the subset of testable apps. This way, the confidence level in the completeness of the test apps is improved over time.
Testing Custom Actions
We’ve written a handful of custom actions that are used as part of our pipeline. As your system grows and you add more custom actions to interact with the backend, it is important to make sure that those actions are tested. Pipeline scripts are often small and untestable, but in a system of this size, we need to have confidence that each of the scripts operates exactly as we expect them to in a variety of situations. Since these actions are written in ruby, we can test them like any other ruby script with rspec. One wrinkle here is that our custom actions depend heavily on other fastlane features, and cannot be invoked or tested outside of fastlane. There is little documentation on testing these actions with rspec, but by browsing through the fastlane source code we can discover the following test pattern:
With this template, we can write tests as normal with rspec. They will be run via fastlane and their behavior can be verified like any other function in rspec.
Other Considerations and Risks
This guide has covered a basic implementation of a scalable white label system. The design decisions we made along the way are fairly robust and will work for a large scale system. However, there are still some unique challenges and issues that do not have technical solutions.
One such issue that arises regularly is that of Apple Developer license agreements. Whenever Apple releases an updated terms of service, the owner of each Apple Developer account needs to sign the new agreement before any applications can be pushed to their accounts. Oftentimes, the account owner will be a customer who otherwise does not access their Apple Developer account on a regular basis. They will each need to be reminded to go sign the new agreement before any app updates can be pushed.
Another issue that arises is that of App Store and Play Store reviews. When submitting a large quantity of apps, especially early in your product’s life, it is common to run into review denials. These can confuse the pipelines about deployed versions, as from the pipeline perspective the app was built and deployed successfully. We have encountered instances of apps being accepted for a while, and then a random new denial appears down the line. This is par for the course on mobile app deployments, but does not have a technical solution available at this time.
A system of this size also carries certain risks. For example, much of our deployment system relies heavily on Google and Apple APIs. These are not guaranteed to work in the same fashion for all time, which would severely cripple the deployment capabilities of our system. In a small-scale white label situation, manually uploading a handful of build artifacts and submitting them for release is not too significant. But if there are hundreds of apps, it becomes impossible to manually release all of them while also trying to address the technical changes required to get things up and running again in the event of an API change.
Furthermore, the rules around the number of Google service accounts and adding an Apple Developer account to any number of apps could change at any time, severely altering the authentication scheme we utilize. While some backups exist (like Apple’s App Store Connect API), they do not offer the same functionality of the current authentication scheme. The ability to push directly to production from the pipelines is not a guarantee and will likely change in the coming years. It is important to keep an eye on changes to these APIs that may be coming in the future and have a backup plan should one of the tools used in your pipeline be deprecated.
One other important consideration in a system like this is that of security. Any time you have sensitive keys that allow direct access to a wide range of different store listings, it is vital to keep them secure and change secrets often. When adding these proxy users and service accounts to customer App Store and Play Store listings, add them with the minimum required permissions for your purposes. Good security practices on this front are critical both for application health and customer confidence in the white labeled product.
Conclusion
Throughout this guide we have seen one possible approach to building a scalable white label mobile application pipeline with fastlane. The business needs of your particular system may require a different approach in some areas, but you should now have a solid understanding of how to build custom fastlane actions to build a robust and scalable pipeline.
.png)
.png)
