
Cross-Platform Mobile Development: Flutter vs. Swift/Kotlin | Phase 2
Since their initial release over a decade ago, mobile platforms iOS and Android now drive more than half of the internet traffic in the world. Whether in B2C or B2B, consumers are asking, “does this work on mobile?” Companies that haven’t focused on mobile development and created dedicated mobile or responsive applications are missing out on a large part of their potential market, as well as risking customers moving to a service that does.
Having a dedicated portal for customers on mobile devices doesn’t come for free, though. It’s not unusual to hear things like “developing for mobile is too much effort” or “I don’t want to maintain a website and two separate mobile applications”. These are completely valid points, it’s no small effort to build a full-featured mobile application. If your development resources are constrained, it may not even be possible.
Two Separate Applications – Going Native with Swift and Kotlin
Traditionally, mobile applications are built with the native tools provided by each platform – Objective-C or Swift when developing for iOS; Java or Kotlin when developing for Android.
Swift, released in 2014, is the latest programming language from Apple. It supports many of the core concepts of Objective-C, the original language for iOS apps, but with a more modern syntax and a number of features lacking in Objective-C.
Apple doesn’t release exact numbers, but several estimates put the number of iOS mobile applications written in Swift at around 50%, and that number will only continue to rise.
Kotlin is a general-purpose language that’s fully interoperable with Java and the language recommended by Google for building Android apps. It has the same first-class Android support as Java, but a more concise syntax and a number of features found in other modern languages like lambda expressions, extension functions, and type inference.
With all of the resources Google and Apple have poured into their ecosystems, creating mobile applications is easier than ever. However, you still can’t get around the fact that building a native application means developing it twice – once for iOS and once for Android.
In recent years, cross-platform frameworks such as Xamarin, Apache Cordova, Ionic and React Native have attempted to solve this problem. The success (or failure) of these frameworks has led Google to step in with their own solution, Flutter.
Introduction to Flutter
What is Flutter? Flutter is a cross-platform mobile framework from Google that lets you build native-compiled applications for desktop, web and mobile platforms. Flutter is unique for a couple reasons. Rather than using Javascript, which has to be marshalled across a bridge with limited bandwidth — a fact that contributes to the performance issues in Ionic and React Native — Flutter uses a compiled language, Dart, and a custom rendering engine running natively on the device to achieve performance on par with fully native apps.
However, in order for it to be viable, the cross-platform framework needs to be transparent to the end user. Users do not care if a framework makes the development process faster and more cost-efficient, especially if the end-result feels slow and difficult to use. If the framework and the developers have done their job well, the user shouldn’t be able to distinguish between an application built on Flutter or natively developed with Swift or Kotlin.
Let’s Build a Feature in Swift, Kotlin, and Flutter
Words only go so far when we’re talking about languages and frameworks. What really matters is the end-user experience and the effort it takes to get there.
So, let’s take a feature and build it using the native tools for each platform then compare it against developing it with Flutter.
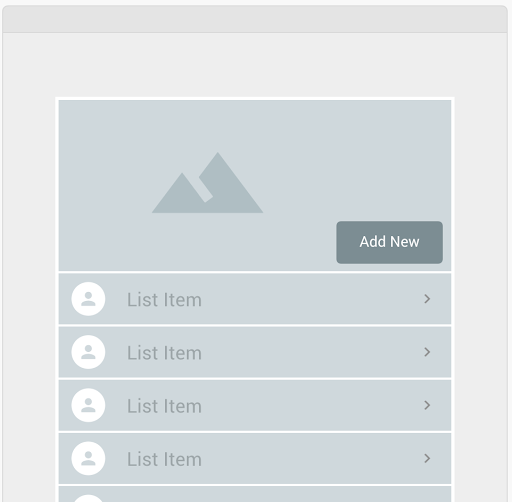
Here’s a mockup of a common feature in apps – a list of items accompanied with images and a button to add more items to the list.
iOS: Creating a TableView with Swift
In Swift, we would generally use a table view to represent this interface. It has built-in functionality to manage rendering and interacting with a list of items.
To get started, open your storyboard and add a new stack view. Nested underneath the stack view, add a view and a table view. Nested underneath the view, add an image view and a button.
Set your constraints and add a little bit of code to handle some basic styling and you should have something like this:

Simple so far, right? Let’s write a little code to populate our table with data.
import UIKit

class ViewController: UIViewController {

    @IBOutlet weak var tableView: UITableView!
    var recipes = [Recipe]()

    override func viewDidLoad() {
        super.viewDidLoad()
        tableView.delegate = self
        tableView.dataSource = self
        loadSampleRecipes()
    }

    private func loadSampleRecipes() {

        let photo = UIImage(named: "avocado")
        let recipe1 = Recipe(name: "Avocado Salad", photo: photo)
        let recipe2 = Recipe(name: "Avocado Toast", photo: photo)
        let recipe3 = Recipe(name: "Avocado Supreme", photo: photo)

        recipes += [recipe1, recipe2, recipe3]
    }
}

extension ViewController: UITableViewDataSource, UITableViewDelegate {
    func numberOfSections(in tableView: UITableView) -> Int {
        return 1
    }

    func tableView(_ tableView: UITableView, numberOfRowsInSection section: Int) -> Int {
        return recipes.count
    }

    func tableView(_ tableView: UITableView, cellForRowAt indexPath: IndexPath) -> UITableViewCell {
        let cellIdentifier = "RecipeTableViewCell"

        guard let cell = tableView.dequeueReusableCell(withIdentifier: cellIdentifier, for: indexPath) as? RecipeTableViewCell  else {
            fatalError("The dequeued cell is not an instance of RecipeTableViewCell.")
        }

        let meal = recipes[indexPath.row]

        cell.title.text = meal.name
        cell.photo.image = meal.photo

        return cell
    }
}
And with that, we should have this:

If you’re new to iOS or Swift, we recommend Apple’s tutorial on creating Table Views.
Android: Creating a RecyclerView with Kotlin
Next, let’s implement the same thing in Android. Here, a recycler view is the Android equivalent of a table view in iOS.
To set up our scene, open your activity, add a constraint layout. Inside of that, add an image view, a button, and a recycler view. Set up your constraints then run the app and you should see something like this:

Now, let’s populate the recycler view.
class MainActivity : AppCompatActivity() {
    private lateinit var linearLayoutManager: LinearLayoutManager
    private lateinit var recyclerAdapter: RecyclerAdapter
    private lateinit var recipes: ArrayList<Recipe>

    override fun onCreate(savedInstanceState: Bundle?) {
        super.onCreate(savedInstanceState)
        setContentView(R.layout.activity_main)
        linearLayoutManager = LinearLayoutManager(this)
        loadSampleRecipes()
        setUpRecyclerView()
    }

    private fun loadSampleRecipes() {
        val photo = R.drawable.avocado
        val recipe1 = Recipe("Avocado Salad", photo)
        val recipe2 = Recipe("Avocado Toast", photo)
        val recipe3 = Recipe("Avocado Supreme", photo)

        recipes = arrayListOf(recipe1, recipe2, recipe3)
    }

    private fun setUpRecyclerView() {
        recyclerAdapter = RecyclerAdapter(recipes)
        recyclerView.layoutManager = linearLayoutManager
        recyclerView.adapter = recyclerAdapter
    }
}


class RecyclerAdapter(private val recipes: ArrayList<Recipe>)  : RecyclerView.Adapter<RecyclerAdapter.ViewHolder>()  {

    override fun onCreateViewHolder(parent: ViewGroup, position: Int): RecyclerAdapter.ViewHolder {
        val inflatedView = parent.inflate(R.layout.recipe_item_row, false)
        return RecyclerAdapter.ViewHolder(inflatedView)
    }

    override fun getItemCount() = recipes.size

    override fun onBindViewHolder(holder: RecyclerAdapter.ViewHolder, position: Int) {
        val recipe = recipes[position]
        holder.setContent(recipe)
    }

    class ViewHolder(v: View) : RecyclerView.ViewHolder(v) {

        var description: TextView = v.findViewById(R.id.description) as TextView
        var image: ImageView = v.findViewById(R.id.itemImage) as ImageView

        fun setContent(recipe: Recipe) {
            description.text = recipe.name
            image.setImageResource(recipe.photo)
        }
    }
}
Not too different from iOS. It’s all mostly boilerplate code which should give you something like this:

If that code looks foreign to you, Ray Wenderlich has a great tutorial on RecyclerView.
Before we move on to Flutter, let’s take one final look at our apps so far.

Notice any differences? The design is actually pretty different between the platforms. That may be good or bad, depending on the goal for your end result. But, we’ll come back to that when we review pros and cons.
Cross-Platform: Creating a ListView with Flutter
In Flutter, we have a list view to handle the same use case as a table view in Swift/iOS or a recycler view in Kotlin/Android. Just like the native controls we looked at before, while you handle populating the table view with your data, Flutter takes care of instantiating each cell in the table, manages scrolling, user input, etc.
An important distinction here is that the list view is a Flutter control or ‘widget’; it’s not an abstraction over the native controls. Instead, the list view is an element drawn by the Flutter engine on its canvas, which runs natively on the device. The API is similar, the look and feel is similar, but the widget is its own unique control – meaning it should render the same way on every device, making it easy to have consistency across platforms.
Now, when developing in Flutter there’s no interface builder. It’s all done in a straightforward, declarative API. And since Flutter supports hot reloading, you can instantly see changes on your device every time you save the file you’re working within.
Let’s set up our scene.
Start by adding a Column with two children, one will be the header section the other will be the list view.
In the header, we’ll use a Stack to overlay a Button on the Image. A BoxDecoration gives us nice rounded edges and the Positioned widget will let us position the button on the bottom right.

The ListView section is a ListView with each item being a ListTile widget.

And that’s it. It looks more verbose than it really is since we don’t have an interface builder to design our layout, but it’s all straightforward – even if you’ve never looked at Flutter code before.
Full code:
import 'package:flutter/material.dart';
import 'package:list_view/recipe.dart';

void main() => runApp(MyApp());

class MyApp extends StatelessWidget {
  @override
  Widget build(BuildContext context) {
    return MaterialApp(
      title: 'My Recipes',
      theme: ThemeData(
        primarySwatch: Colors.blue,
      ),
      home: RecipeHome(title: 'Recipe Home Page')
    );
  }
}

class RecipeHome extends StatefulWidget {
  RecipeHome({Key key, this.title}) : super(key: key);

  final String title;

  @override
  _RecipeHomeState createState() => _RecipeHomeState();
}

class _RecipeHomeState extends State<RecipeHome> {
  @override
  Widget build(BuildContext context) {
    return Scaffold(
      body: Center(
        child: SafeArea(
          child: Column(
            children: <Widget>[
              Header(),
              RecipeList()
            ]
          ),
        )
      )// This trailing comma makes auto-formatting nicer for build methods.
    );
  }
}

class Header extends StatelessWidget {
  const Header({
    Key key,
  }) : super(key: key);

  @override
  Widget build(BuildContext context) {
    return Stack(
      children: [
        Container(
          width: MediaQuery.of(context).size.width,
          height: 200,
          margin: EdgeInsets.all(16),
          decoration: BoxDecoration(
            image: DecorationImage(
              fit: BoxFit.fill,
              image: AssetImage('header.png')
            ),
            borderRadius: BorderRadius.all(Radius.circular(13))
          ),
        ),
        Positioned(
          right: 24.0,
          bottom: 16.0,
          child: Padding(
            padding: const EdgeInsets.all(8.0),
            child: RaisedButton(
              onPressed: () {},
              child: Text('Add New'),
              shape: RoundedRectangleBorder(borderRadius: BorderRadius.circular(5)),
            ),
          ),
        )
      ],
    );
  }
}

class RecipeList extends StatelessWidget {
  const RecipeList({
    Key key,
  }) : super(key: key);

  @override
  Widget build(BuildContext context) {
    List<Recipe> recipes = <Recipe>[
      Recipe('Avocado Salad', 'avocado.png'),
      Recipe('Avocado Toast', 'avocado.png'),
      Recipe('Avocado Supreme', 'avocado.png')
    ];

    return ListView.builder(
      itemCount: recipes.length,
      itemBuilder: (BuildContext context, int index) {
        return ListTile(
           leading: Image.asset(recipes[index].photo),
           title: Text(recipes[index].name)
        );
      },
      scrollDirection: Axis.vertical,
      shrinkWrap: true,
      padding: EdgeInsets.symmetric(vertical: 0.0, horizontal: 16.0),
    );
  }
}
Since everything in Flutter is code, that’s the entire app. Here’s the final design in Flutter running on both platforms:

We have an iPhone XS on the left and a Pixel 2 on the right. Notice how everything is consistent between the two devices cross-platform even though they’re different operating systems, screen sizes and even screen shapes considering the ‘notch’ on the iPhone.
Pros & Cons: Flutter vs. Full Native Development
So far, we’ve looked at implementing a simple design using Swift for iOS, Kotlin for Android, and Flutter for both platforms.
Is there a clear winner? Flutter looks pretty strong, but each platform’s native toolset has a lot to offer.
Pro: Native OS Platform
Both Swift and Kotlin do a great job providing the tools needed to develop world-class mobile applications. It’s easy to build native apps that look like native apps to the end user. The UI can be tweaked and customized to the fullest degree to get it exactly right for each platform and each device, animations are smooth and beautiful, and user taps and gestures are super responsive.
But that refined customization comes with a cost.
Con: Native OS Platform
Building two fully-native apps, unsurprisingly, takes twice the resources of building one. It means double the cost, double the timelines, double the effort. For all of this, though, you get absolute control over the look and feel that best fits each platform and its users.
In some cases, that level of customization is important. You have a specific vision for the UI/UX on each platform and the native toolset allows each version to be distinct. The screenshot that compares our native implementation for each platform is a case in point. Native controls have a certain look and feel out of the box familiar to users on each platform. Because users know what to expect from the interface idioms on their chosen platform, they immediately know how they should interact with your application, just like any other they are familiar with.
Pro: Flutter
However, in the argument for Flutter, there are several instances where the distinction between the two platforms isn’t important at all. In fact, if you look at some of the biggest brands now, their iOS and Android apps are nearly indistinguishable. They’ve chosen a more consistent, branded style over native design standards.
When you don’t need (or want) a different look across devices, a cross-platform framework like Flutter can nearly cut a project’s budget in half. A team using Flutter can deliver an app on both platforms for nearly the same amount of effort as delivering on one.
Flutter not only reduces development time, but testing cycles are also quicker. One of the challenges in mobile development is accounting for various devices and screen sizes, as well as testing their layout dynamics. While this doesn’t completely disappear with Flutter, a shared rendering engine across all devices gives you a higher confidence interval while testing on fewer devices.
Con: Flutter
Flutter is still a relatively new framework. It doesn’t yet have the robust ecosystem that exists around the native platforms and in some cases isn’t the right fit for cross-platform development. There will be places where the framework doesn’t quite provide what you need, leading you to build custom native components for each platform, regardless. At some point, you may find yourself maintaining enough native code that the overhead of Flutter isn’t worth the effort.
Another consideration to keep in mind is Flutter is a third-party framework. You are relying on maintainers of the framework to continue to keep it up to date as each native platform grows and evolves over time. There may be cases where new features on each mobile platform aren’t fully supported or there may be periods of instability. It does have a good track record so far, but that’s no guarantee of its long-term success.
Where Does That Leave Us?
In the world of cross-platform software development, the ability to deliver features is what matters. That set of features is what ultimately solves the end user’s problem. It’s why we create software in the first place.
Flutter allows you to deliver features faster. Each of the examples above took the same amount of time to create, give or take a few minutes. For every minute spent building a feature in Flutter, two are spent building it natively.
For a small app, the incremental time to build a feature twice may not have a meaningful cost. And it may be justifiable if that incremental cost gives you more control. But for large apps where it’s not unusual to spend thousands of development hours on one platform over the life of the project, the cost savings of a cross-platform framework can be significant.
Flutter is no magic bullet, but it is a compelling option – especially when timelines or budgets are a concern and cross-platform-specific customization isn’t needed.
Stock photos in mockups by Eiliv-Sonas Aceron on Unsplash.